 |
|
 |
| 1: Preparing the Azuki Paste |
|
|
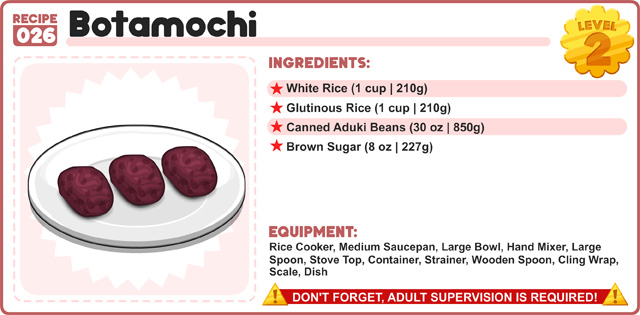
Botamochi is a unique treat from Japan made of sweet rice and Azuki paste. We first introduced Botamochi in Papa’s Cupcakeria HD.
First you will need to find two 15oz cans of Azuki Beans. They also go by several alternate names including Adzuki, and Aduki. Not the dry bag of beans, but the cans. If you can only find dry azuki beans, you will have to prep them a bit different.
Empty the contents (beans and liquid) of the cans into a medium saucepan. Mix in the brown sugar. Boil the mixture for 45 minutes while stirring occasionally.
Then pour the contents into a mixing bowl, and blend until it is a mash potato like consistency.
Let the bean paste cool down. Then place it in a container, cover, and place it in the refrigerator until cold. |
|
|
|
Pour in the Glutinous Rice and the White Rice into a strainer and rinse it 2-3 times. Let the rice sit in the strainer for about 30 minutes.
Pour the rice into a Rice Cooker. Fill with water until water is 1 inch over the top of the rice. Cook at the “White Rice” Setting (around 30 minutes).
When the rice is done, mash it with a wooden spoon into a mushy consistency.
If you do not have a Rice Cooker, you will need to cook the rice on the stove top. |
|
|
|
First, place a sheet of cling wrap on a scale. Place 2 oz (56.7 g) of Azuki Paste on the the cling wrap. Flatten it out into a disk.
Roll a 1.25 oz (25.4g) ball of rice and place it on the center of the Azuki Paste disk.
The sheet of cling wrap will act as a barrier between your hands and the bean paste. Encapsulate the rice ball with Azuki Paste by folding up all the corners and edges of the cling wrap around the rice. Twist the ends of the cling wrap together so it packs the rice and paste together nicely.
Now you have a perfect Botamochi. Unwrap, place it on a dish, and try to make some more. |
|
|
|
 |
|
|
|
|
Last time, we had you make Apple Crisp Pie. Let’s see some examples:
|
|
|
|
|
In a large mixing bowl, combine the flour, shortening, white sugar, and salt. Mix it up until it is blended and crumbly.
In a small bowl, whisk the egg and water together. Pour it into the flour mixture, and blend them together.
On a clean surface, sprinkle flour, and roll out the dough into a large flat disk. Spray the pie pan with cooking spray and place dough in it. Firmly press the dough against the bottom and sides of the pan, and trim any overhanging dough from the rim of the pie pan. Using your fingers, flute the dough around the perimeter of the pan. |
|
|
|
In a medium bowl, pour all the Streusel toppings together and mix by hand until it is blended and crumbly. |
|
|
|
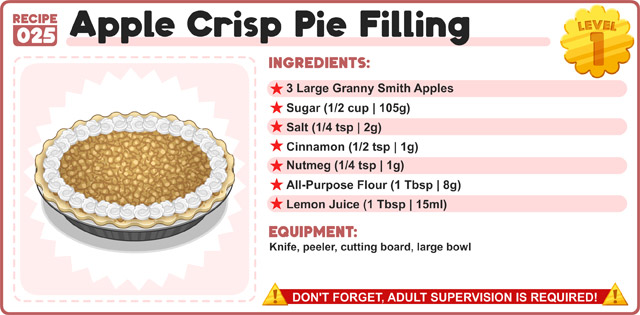
Carefully wash, peel, core, and slice the apples into thin slices. Mix the sliced apples with the rest of the filling ingredients in a large bowl. |
|
|
|
First, Preheat the oven to 400°F (204°C).
Pour the pie filling into the dough-lined pie pan. Cover the top of the filling with all of the Streusel mix.
Bake the pie for 40-45 minutes or until the pie crust and streusel are golden brown. Then, take the pie out of the oven and allow it to cool down.
Once it is cooled, spray whipped cream around the inside edge of the pie, slice, and enjoy! |
|
|
|
|
|
|
|
|
Last time, we had you make a Toastwood Poutine. Let’s see some examples: