Papa Louie Pals: Word Bubbles

Hey Everyone!
Welcome back to another sneak peek of Papa Louie Pals! This week we will be talking all about adding word bubbles to your scene!
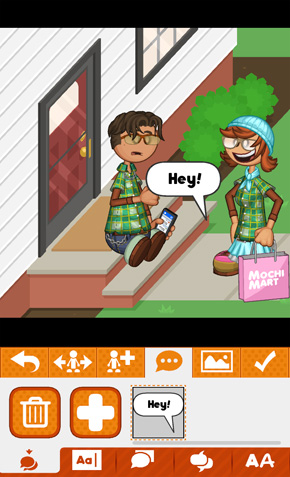
First you will head over to the ![]() Word section. This section has five subcategories, the first being the
Word section. This section has five subcategories, the first being the ![]() Add Bubble sub-section. On your first time going to this section, you will have to make a word bubble by press the
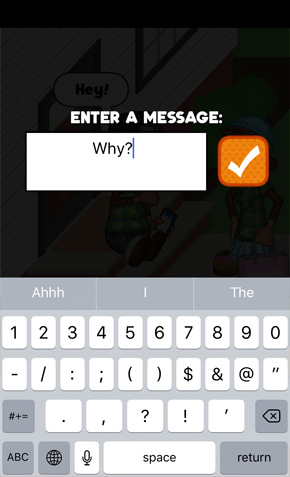
Add Bubble sub-section. On your first time going to this section, you will have to make a word bubble by press the ![]() Add button. When you press that button, a default word bubble will appear on the screen that says “Hey!”. To change the text inside the bubble, select the bubble and go to the
Add button. When you press that button, a default word bubble will appear on the screen that says “Hey!”. To change the text inside the bubble, select the bubble and go to the ![]() Type sub-section. There you can type in whatever text you would like to appear in the word bubble. When you are done, click the orange check mark to return to the scene.
Type sub-section. There you can type in whatever text you would like to appear in the word bubble. When you are done, click the orange check mark to return to the scene.
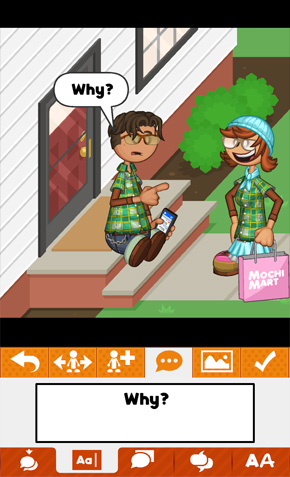
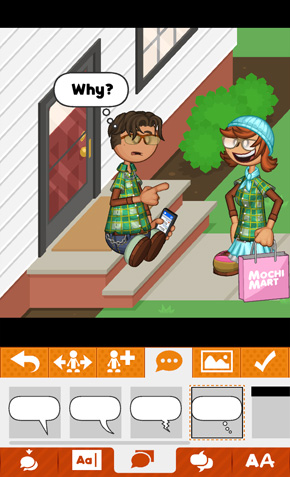
You can drag a word bubble around the scene to line it up with your Pal. In the ![]() Style sub-section, you can change the way the word bubble looks.
Style sub-section, you can change the way the word bubble looks.
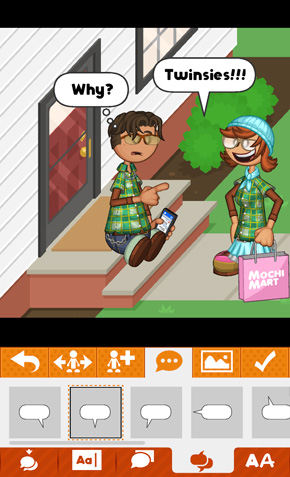
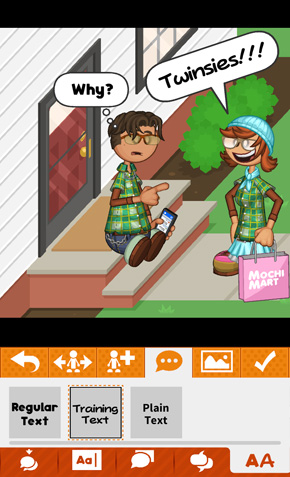
You can change the placement of the word bubble’s tail by going the ![]() Location sub-section. If you go to the
Location sub-section. If you go to the ![]() Font sub-section you can change the style of the text inside the word bubble. Using two fingers, you can scale and rotate the word bubbles.
Font sub-section you can change the style of the text inside the word bubble. Using two fingers, you can scale and rotate the word bubbles.
We also have two additional word bar styles to choose from in the ![]() Style sub-section.
Style sub-section.
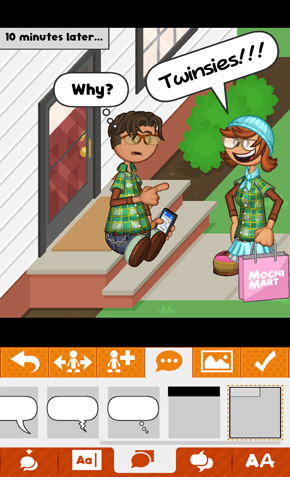
The first one is a ![]() caption bar that you can align to any of the four corners. This is good for describing time, location, or narration. In this example we added a caption bar in the upper left corner that says “10 minuts later…”
caption bar that you can align to any of the four corners. This is good for describing time, location, or narration. In this example we added a caption bar in the upper left corner that says “10 minuts later…”
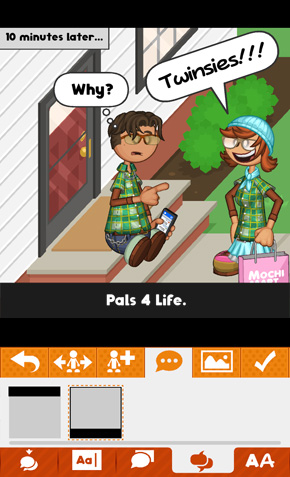
The second type is a ![]() title bar which can be placed at the top or bottom of the screen. In this example, we added a title bar to the bottom of the screen that says “Pals 4 Life.”
title bar which can be placed at the top or bottom of the screen. In this example, we added a title bar to the bottom of the screen that says “Pals 4 Life.”
That’s it for this week’s preview, stay tuned for more sneak peeks of Papa Louie Pals!
